Manage Brand Settings
Update a brand's picture and details, and understand what happens if you delete it.
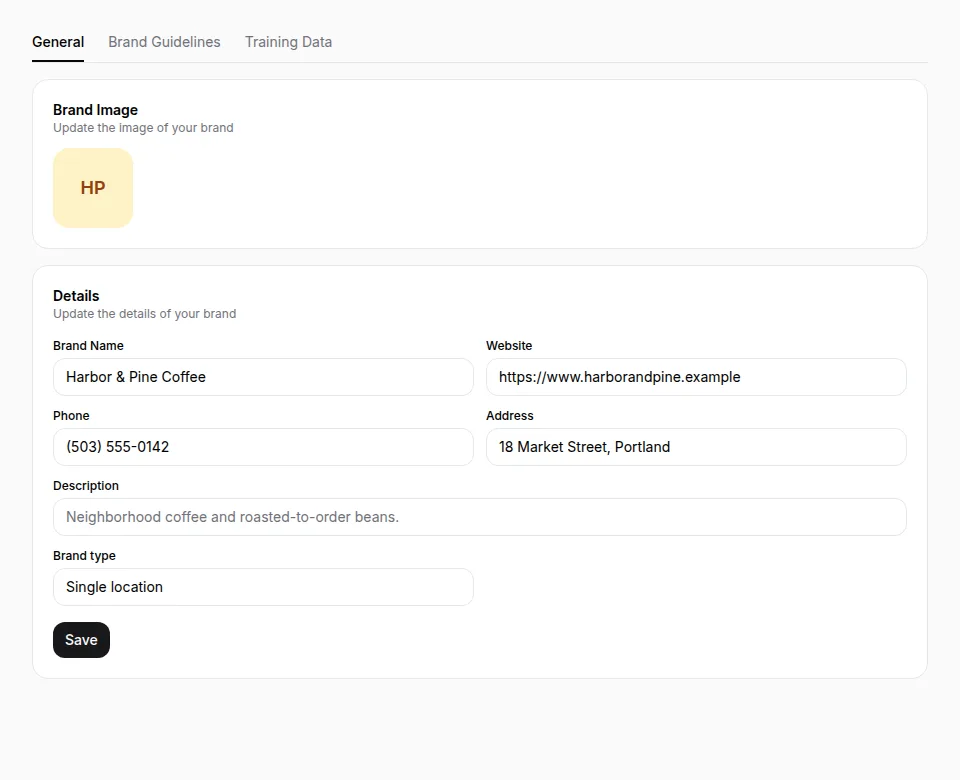
Brand settings live under three tabs: General, Brand Guidelines, and Training Data. This page covers General — picture, details, and deletion. Integrations are also on General; they have their own guide.
1. Open General
- Open the brand.
- Select Settings in the sidebar.
- Stay on General.
2. Update the brand picture
The Brand Image card uploads as soon as you choose a file. There is no separate Save for the picture.
- Select the image control and choose a browser-recognized image.
- Wait for the success toast.
- To replace it, select the picture again.
- Clear removes the picture.
Website extraction can also fill a missing picture. A picture you set here is not undone by later extraction of other fields.
3. Update brand details
The Details card includes:
| Field | Notes |
|---|---|
| Brand Name | 2–100 characters |
| Website | Optional after create. You can clear it, but many generators still need it. |
| Phone | Optional |
| Address | Optional |
| Description | Up to 2,000 characters. Used to guide generation. |
| Brand type | Online, Single location, or Multiple locations |
Choose Save. Invalid fields are not saved.
Warning: Saving a new website does not start extraction. Open Brand Guidelines and choose Extract from website when you want the site reread.
4. Delete a brand
Deletion is in the Danger Zone card, and only when brand deletion is enabled for your team.
Warning: Deleting a brand cannot be undone. Export anything you need first. A successful delete removes the brand and the work that belongs to it, including generated ads, campaigns, personas, members, and publishing connections.
- Confirm the header still shows the brand you intend to delete.
- Scroll to Danger Zone.
- Choose Delete.
- Read the confirmation. The dialog asks you to type
DELETE. - Type
DELETEand choose Delete again.
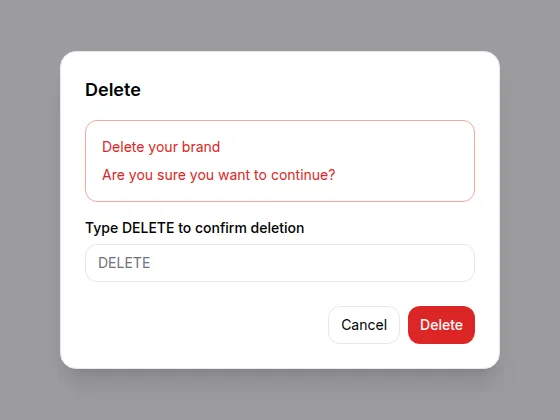
You need permission to delete the brand (typically a brand owner). If Delete fails, the brand is still there — leftover Display Tags or older Creatives can block the delete. Remove those first, or ask a team owner. Do not keep retrying the same confirmation.
A brand with creative sets in progress cannot be deleted either: This brand has creative sets in progress. Cancel them or wait for them to finish, then delete the brand. Open Sets, and wait for them to finish or choose Cancel remaining — see Work with a creative set.
After a successful delete you leave the brand workspace. Use the team Brands page to confirm it is gone.
Do not delete a brand to "start over" if you only need a new website or guidelines. Update General, then extract guidelines.