Create a Brand
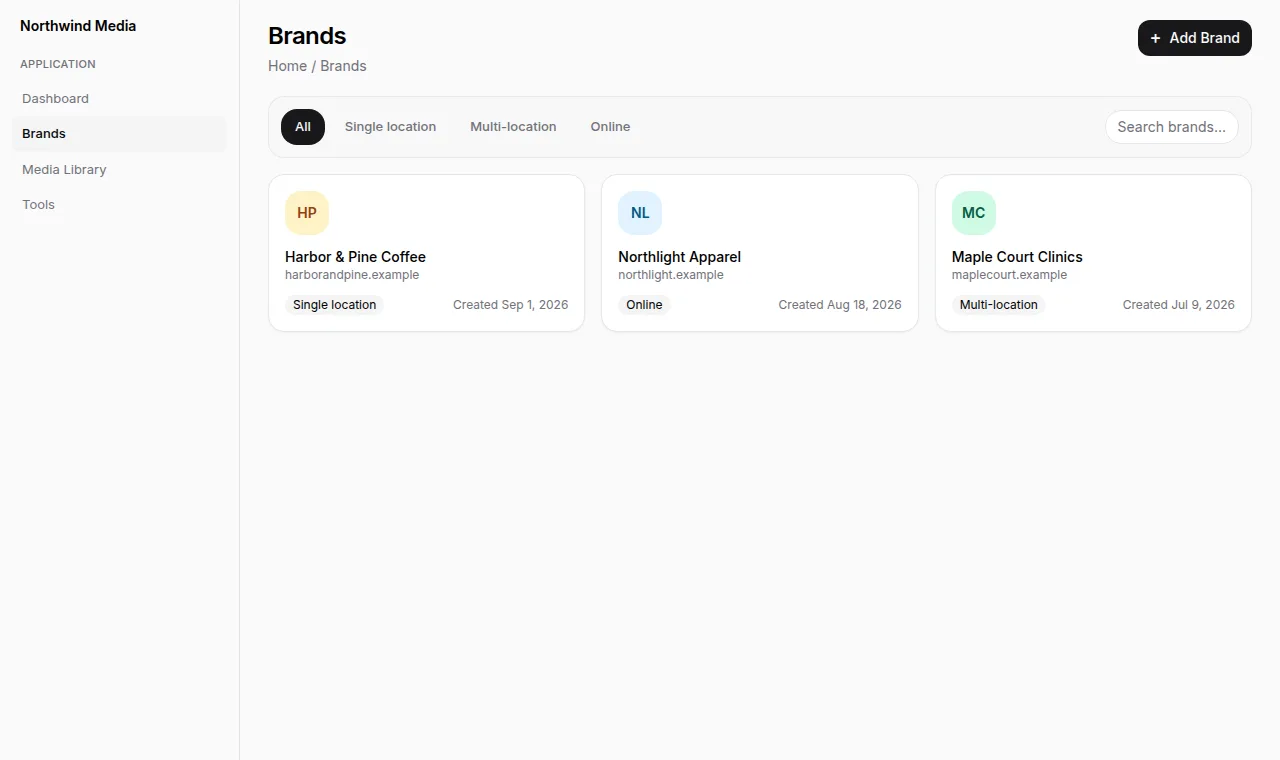
Add a brand from Google Places or a custom name, then open its workspace.
Create one brand per business you advertise for. The create dialog asks for a brand type, a name, and a website, then opens the new brand workspace.
Before you start
- You are in the correct team
- You know whether this business is a single location, several locations, or online-only
- You have the public website URL, including
https://
Important: A website is required when you create a brand. Many generators use that site. Enter the brand's own website, not a directory page or social profile.
1. Open the create dialog
- In the team workspace, select Brands.
- Choose Add Brand. If the list is empty, the empty state Create brand button opens the same dialog.
- You can also choose Create Brand from the brand selector inside an existing brand.
The dialog title is Create Brand.
2. Choose a brand type
| Type | When to use it |
|---|---|
| Single Location | One storefront or office. Default. |
| Multiple Locations | A business with more than one place. This does not create one brand per location. |
| Online Only | No physical location to look up in Google Places. |
Changing the type clears the name, selected place, and website so you start that path cleanly.
3. Find the business or enter it yourself
Single Location or Multiple Locations
The Brand Name field starts as a Places search. The placeholder reads Search for your business or enter website URL...
- Type at least two characters.
- Review the matches. A result can show the business name, category, address, and website.
- Select the correct listing. The form fills the name and, when Google has one, the website. Address, phone, and an editorial summary may be stored as well.
- Edit the name if you need a shorter or official version.
- Confirm the website is the brand's real site. Add it if Google left it blank.
- If the listing is wrong, choose Search for a different place.
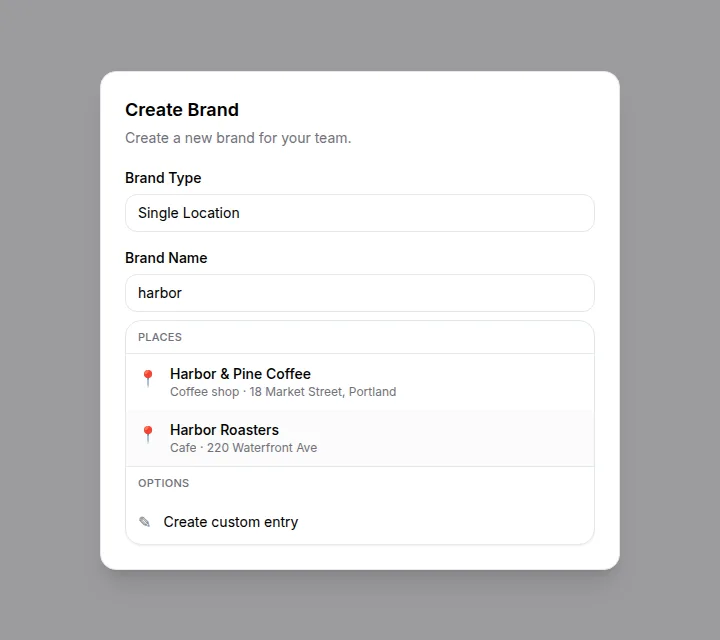
If no listing is correct, choose Add "{name}" as a new business. A pasted website shows Website URL detected, Add "{name}" as a new business, and Starts from the website you entered. You still confirm Website before you continue.
Create custom entry appears when the text is not a usable website yet. The hint is Fix the URL above to continue (http:// or https:// required).
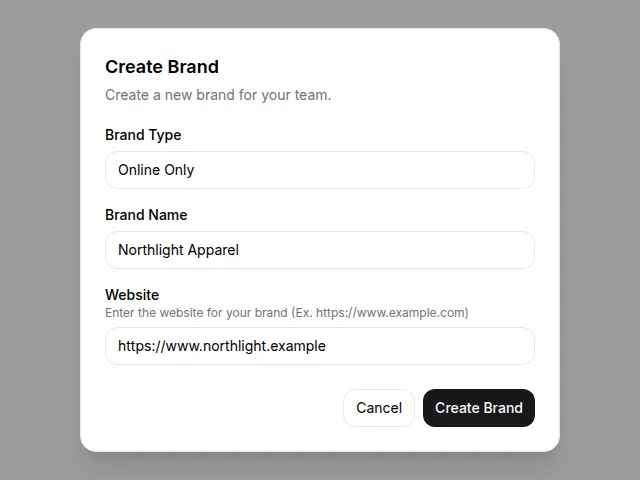
Online Only
Places search is skipped.
- Type the Brand Name.
- Enter the Website.
- Choose Create Brand.
4. Create and land in the workspace
- Choose Create Brand.
- The brand workspace opens at
/home/brands/…. - Website analysis starts in the background. You do not wait on a scrape screen.
The brand exists even if background processing fails. Continue to Brand Guidelines and run Extract from website if colors, logos, or fonts are still empty.
A duplicate name on the same team is rejected. Change the name and try again.
After you create
- Confirm the header shows the brand you intended.
- Open Settings → General and check the website, type, and picture.
- Open Brand Guidelines and review what was extracted.